Category Archives: Lab

Setup Stratum-1 Time Server

พรบ.คอมฯ 50 กำหนดไว้ว่าผู้ให้บริการต้องเก็บข้อมูลจราจรคอมพิวเตอร์ โดยมีความคลาดเคลื่อนของเวลาไม่เกิน 10 msec. จากเวลาอ้างอิง (stratum-0) ซึ่งเป็นเวลาที่ได้จากนาฬิกาอะตอม .. time source ที่เป็นนาฬิกาอะตอมไม่ได้หายากอย่างที่คิด สัญญาณจากดาวเทียม GPS ก็เป็นเวลาที่ได้จากนาฬิกาอะตอมเหมือนกัน ดังนั้นเซ็ต stratum-1 time server ก็แค่ใช้ time source จาก GPS เท่านั้นเอง

เพิ่งได้ USB GPS receiver แบบไม่มียี่ห้อ มาเมื่อหลายวันก่อน ใช้ชิปของ U-Blox ANTARIS LEA-4S ซึ่ง output เป็น NMEA messages ออกมาทาง USB ได้เลย และส่ง 1-Pulse-Per-Second (1PPS) ได้ด้วย เสียบ USB GPS Receiver เข้าคอมพิวเตอร์ (ติดตั้ง เดเบียน ลินุกซ์) ลอง cat /var/log/syslog หรือ dmesg ก็เห็นข้อความประมาณนี้

...
cdc_acm 1-1:1.0: ttyACM0: USB ACM device
usbcore: registered new driver cdc_acm
drivers/usb/class/cdc-acm.c: v0.25:USB Abstract Control Model driver for USB modems and ISDN adapters
...

แปลได้ว่าลินุกซ์เห็น USB GPS receiver เชื่อมกับ USB แล้ว และกำหนด device เป็น /dev/ttyACM0 ลอง

$ lsusb
...
Bus 001 Device 002: ID 1546:01a4 U-Blox AG
...

จะเห็นว่าลินุกซ์รู้จัก U-Blox AG. ด้วย ..ว่าแล้วก็ cat /dev/ttyACM0 ดูเลย

$ cat /dev/ttyACM0
...
$GPRMC,180032.00,A,1628.32246,N,10249.53339,E,0.362,287.84,261208,,,A*62
$GPVTG,287.84,T,,M,0.362,N,0.671,K,A*3B
$GPGGA,180032.00,1628.32246,N,10249.53339,E,1,04,3.23,226.6,M,-27.1,M,,*76
$GPGSA,A,3,22,32,16,06,,,,,,,,,3.98,3.23,2.31*02
$GPGSV,3,1,11,18,04,149,,14,46,058,,22,37,158,42,30,16,038,*71
$GPGSV,3,2,11,32,31,319,20,31,45,353,,29,11,081,,20,08,321,*7C
$GPGSV,3,3,11,16,55,199,44,03,03,197,33,06,10,185,27*4E
$GPGLL,1628.32246,N,10249.53339,E,180032.00,A,A*6C
$GPZDA,180032.00,26,12,2008,00,00*63
$GPRMC,180033.00,A,1628.32249,N,10249.53329,E,0.191,285.38,261208,,,A*66
$GPVTG,285.38,T,,M,0.191,N,0.354,K,A*32
$GPGGA,180033.00,1628.32249,N,10249.53329,E,1,04,3.24,226.6,M,-27.1,M,,*7E
...

จะเห็นเป็น NMEA messages ขึ้นมา .. ข่าวดีคือ NTP อ่าน NMEA message มาเป็น time source ได้เลย .. ก่อนอื่นลง package ntp ก่อน

$ sudo aptitude install ntp

แก้ไฟล์ /etc/ntp.conf เพิ่ม server ที่ใช้ Generic NMEA driver

server 127.127.20.0
fudge 127.127.20.0 time1 0.0 refid GPS

Restart ntp รอสัก 1-2 นาที แล้ว query ดู

$ ntpq -p
     remote           refid      st t when poll reach   delay   offset  jitter
==============================================================================
*GPS_NMEA(0)     .GPS.            0 l   13   64  377    0.000   -2.154   3.517

แปลว่า ntp มัน sync กับ stratum-0 time source ได้ และขึ้นมาเป็น stratum-1 NTP server เรียบร้อย :D

อย่างไรก็ตาม หลังรันเซิร์ฟเวอร์และเก็บสถิติไปสักพักก็พบว่า นาฬิกามันไม่ได้แม่นยำอย่างที่คิด เวลาที่ได้มีความคลาดเคลื่อนแกว่งไปมาในช่วง +/- 4 msec บางจังหวะ peak ไปถึง +/- 20 msec ซึ่งถือว่าเป็น stratum-1 server ที่ performance ไม่ได้เรื่องเท่าไหร่ และยังไม่ได้ตามข้อกำหนดตามกฎหมายด้วย .. สาเหตุความคลาดเคลื่อนคงเพราะ NMEA message ไม่ใช่ time source ที่แม่นยำ .. ถ้าจะให้แม่นยำกว่านี้ ต้องใช้ 1PPS

USB GPS receiver ที่ได้มามันไม่ได้ต่อ 1PPS ออกมาให้ใช้งาน จะใช้ก็ต้องต่อเอง .. สิ่งที่ต้องใช้ก็มี DB-9 connector ตัวเมีย สายไฟ หัวแร้งบัดกรี ตะกั่วบัดกรีนิดหน่อย คู่มือของ U-Blox ANTARIS LEA-4S บอกว่าขา 1-PPS (i.e., TIMEPULSE) อยู่ที่ขา 28 จอเข้ากับขา 1 ของ DB-9 (ขา Data Carrier Detect ของ RS-232) และต่อ ground ของ receiver ไปยังขา 5 (GND) ของ DB-9 connector ก่อนเอาไปต่อก็เอา scope วัดสัญญาณดู สัญญาณ 1PPS จะเป็น pulse low-to-high amplitude 3.3 V ใช้ rising edge บอกวินาที

เมื่อต่อเข้ากับ RS-232 ของเครื่อง แล้วทีนี้จะอ่านสัญญาณ 1PPS ยังไงดี ? .. มีอยู่สามทางเลือก LinuxPPS, GPSD, และ SHMPPS

  • LinuxPPS เป็น PPSAPI implementation ตาม RFC2783 มีผลพลอยได้คือ precision ของนาฬิกาจะเป็น nanosecond แต่ต้อง patch / recompile kernel และอาจจะต้อง patch ntpd อีกด้วย (- -‘)
  • GPSD เป็นอีกทางเลือก ลองแล้วไม่สำเร็จ ทั้งที่ GPSD อ่านสัญญาณ 1PPS จาก /dev/ttyS0 แล้ว แต่มันไม่ signal ไปยัง ntpd .. GPS receiver แบบที่ป้อน 1PPS + NMEA ผ่าน RS-232 เพียวๆ อาจจะใช้กับ GPSD ได้
  • SHMPPS เป็นโปรแกรมอ่าน signal จาก serial/parallel port เลือก signal ได้หลายขา แล้วส่งไปยัง ntpd ผ่านทาง SHM (SHare Memory) .. อันนี้ง่ายสุดแล้ว

ก่อนอื่น แก้/เพิ่ม config ใน /etc/ntp.conf ให้ใช้ SHM driver

server 127.127.28.0 minpoll 4 maxpoll 4 prefer
fudge 127.127.28.0 refid PPS

ดาวน์โหลด shmpps extract / make จะได้ shm_splc2 เป็น binary และมี wrapper scripts อีก 2 ตัว ไม่ต้องสนใจ wrapper script ก็ได้ .. ลองสั่งให้ shm_splc2 อ่านสัญญาณ Data Carrier Detect จาก /dev/ttyS0 กันเลย

$ /usr/local/sbin/shm_splc2 -d /dev/ttyS0 -s -l DCD -u 0 -D &

รอสักพัก

$ ntpq -p
     remote           refid      st t when poll reach   delay   offset  jitter
==============================================================================
*SHM(0)          .PPS.            0 l    3   16  377    0.000    0.047   0.003
+GPS_NMEA(0)     .GPS.            0 l   13   64  377    0.000   -2.154   3.517

ทิ้งไว้สักพักใหญ่ๆ .. offset และ jitter จะค่อยๆ ลู่เข้าสู่ 0.000

$ ntpq -p
     remote           refid      st t when poll reach   delay   offset  jitter
==============================================================================
*SHM(0)          .PPS.            0 l    3   16  377    0.000    0.000   0.001
 GPS_NMEA(0)     .GPS.            0 l   33   64  377    0.000   -5.702  5.288

ปิดท้าย ดูจากกราฟก็จะเห็นว่ามันไม่ได้ 0.000000 s เสียทีเดียว แต่มีจังหวะแกว่งมากบ้างน้อยบ้าง จะเห็นว่านาฬิกามันไม่เที่ยงก็ต้องดู scale usec ซึ่งเทียบกับ stratum-1 servers ของหลายๆ แห่งก็จะได้ precision ประมาณเดียวกัน และน่าจะเกินพอสำหรับ พรบ. ..

เทียบ Offset ของ NMEA กับ 1PPS (scale: msec)

เทียบ Jitter ของ NMEA กับ 1PPS (scale: msec)
Offset ของ 1PPS (scale: usec)

Jitter ของ 1PPS (scale: usec)

GPS and Linux

ได้ USB GPS receiver มา (ของ ยี่ห้อนี้) ไม่ต้องคิดมาก เสียบ แล้ว dmesg ดู

$ dmesg
[157930.448089] usb 2-1: new full speed USB device using uhci_hcd and address 3
[157930.612998] usb 2-1: configuration #1 chosen from 1 choice
[157930.718842] cdc_acm 2-1:1.0: ttyACM0: USB ACM device
[157930.726652] usbcore: registered new interface driver cdc_acm
[157930.727462] cdc_acm: v0.26:USB Abstract Control Model driver for USB modems and ISDN adapters

อ่อ มี ttyACM0 … cat ดูโลด

$ cat /dev/ttyACM0
$GPRMC,115258.00,A,1628.33537,N,10249.54838,E,0.155,223.32,081208...
$GPVTG,223.32,T,,M,0.155,N,0.288,K,A*3C
$GPGGA,115258.00,1628.33537,N,10249.54838,E,1,08,1.68,185.0,M,-27.1....
$GPGSA,A,3,26,24,15,12,05,29,10,30,,,,,2.29,1.68,1.56*0F
$GPGSV,3,1,12,26,60,037,19,24,49,356,18,15,80,028,22,02,29,105,*7F
$GPGSV,3,2,12,12,08,193,22,05,08,205,33,18,20,278,17,29,59,280,22*7C
$GPGSV,3,3,12,10,22,041,13,21,15,320,19,30,09,228,21,09,21,169,20*75
$GPGLL,1628.33537,N,10249.54838,E,115258.00,A,A*63
...

อืมมม NMEA message มาเลย :) .. งั้น GPSd เลยดีกว่า

$ sudo aptitude install gpsd gpsd-clients

ลอง man แล้ว run แล้วไม่ work แฮะ .. ถาม อ.กู้เห็นบางคนเขาจะ set speed ก่อน

$ stty -F /dev/ttyACM0 ispeed 9600
$ gpsd /dev/ttyACM0

ทีนี้ก็

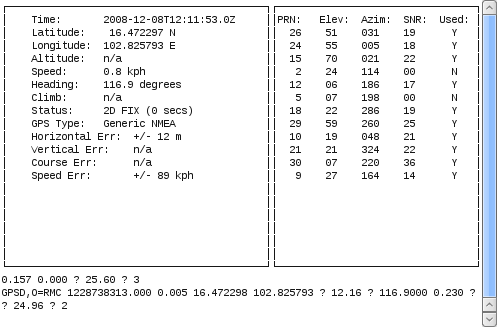
$ cgps

ได้ผลเป็นแบบนี้

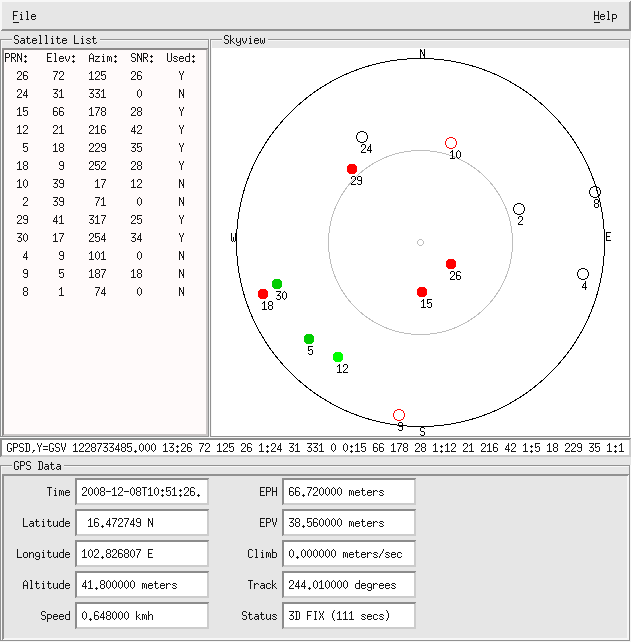
หรือจะ

$ xgps

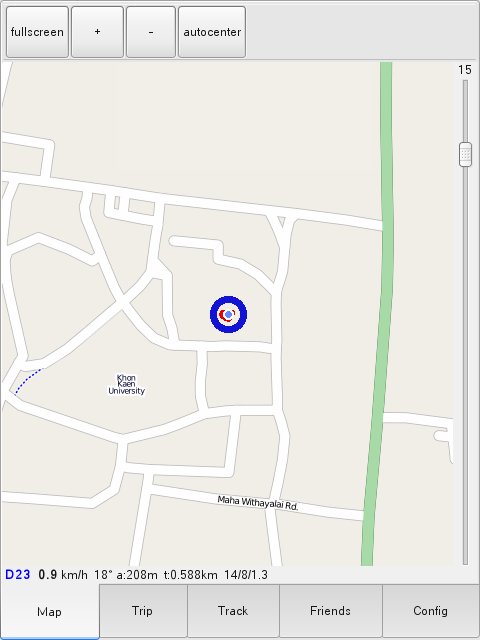
หรือจะลอง tangoGPS

More tangoGPS screenshot: Street Map | Arial | Topo

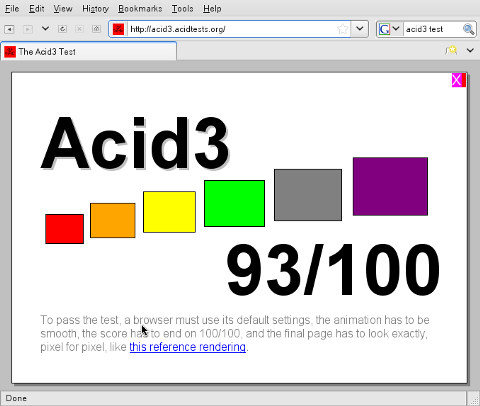
Acid3 Test & JavaScript Speed Test on Firefox 3.1b2pre

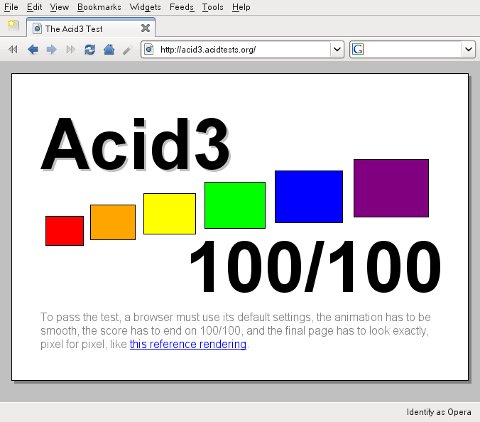
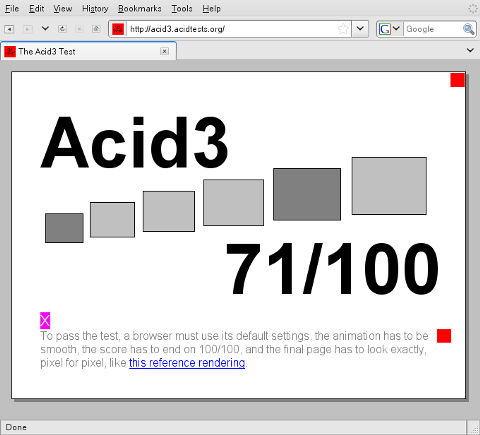
เห็นคุยๆ กันเรื่อง Firefox 3.1 แวบๆ บน /. ประกอบกับ PPA ของ Ubuntu มีคนทำ .deb ไว้ เลยเอามาลอง Acid3 กับ JavaScript เทียบกับ Firefox 3.0.3 และ Opera 9.61 ดู ..

Firefox 3.0.3

Opera 9.61

Firefox 3.1b2pre

ส่วน JavaScript ก็

ทดสอบ Acid3 ที่ http://acid3.acidtests.org

ทดสอบ JavaScript ที่ http://celtickane.com/webdesign/jsspeedarchive.php

เครื่องทดสอบ Apple Macbook 2.1 Ubuntu 8.10.

Note: Speed test ทดสอบ 10 ครั้งแล้วหาค่าเฉลี่ย ต้องไม่ลืมว่า ผลที่ได้เป็น relative เน้อะ YMMV.

Firefox 3.0 : vanilla v.s. ubuntu-built

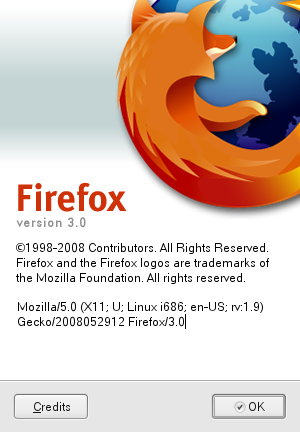
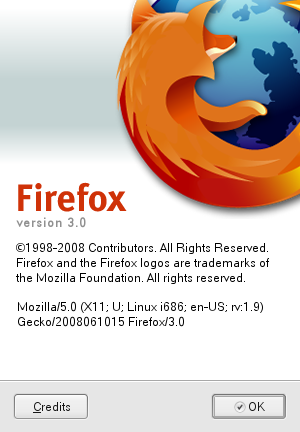
.. กด About ดูแล้วแปลกๆ

อันนี้ตัว vanilla ที่เพิ่งออกไปเมื่อ 17-18 มิ.ย. 51 DST

อันนี้ safe-upgrade ผ่าน aptitude ของ Ubuntu 8.04 เมื่อหลายวันก่อน

ดูบรรทัดสุดท้าย .. ของ Ubuntu เหมือนจะใหม่กว่าแฮะ (- -‘)

SD Card Corrupted!

ระหว่างเดินทางท่องเที่ยวทริปแห้งๆ เม็มโมรีการ์ดของสมาชิกแก๊งแมวๆ เกิดเจ๊ง ชนิดอ่านอะไรก็ไม่ได้ จะ mount ก็ไม่สำเร็จ เน่าจริง! ถ้าเจออาการประมาณนี้ ไม่ต้องตกใจ และอย่าเพิ่งถอดใจฟอร์แมตทิ้ง (จริงๆ แล้วต่อให้ฟอร์แมต ก็อาจจะกู้ได้นะ ตราบใดที่ข้อมูลยังไม่โดนเขียนทับ – หรือทับไปแล้วก็ยังอาจจะได้ ถ้ามีพวก magnetic force microscope :P).. เดี๋ยวนี้ วิธีกู้ง่ายกว่าที่คิดไว้เยอะ ก่อนอื่น lock/write protect ตัวเม็มโมรีการ์ดไว้ก่อน (ถ้าทำได้) แล้วก็เสียบเข้าการ์ดรีดเดอร์ ดู /var/log/messages ควรจะเห็นอะไรประมาณนี้

sd 4:0:0:2: [sdd] 2048000 512-byte hardware sectors (1049 MB)
sd 4:0:0:2: [sdd] Write Protect is off

แปลว่าลินุกซ์มองเห็นการ์ดผ่าน /dev/sdd ทีนี้ก็ dump image ได้แล้ว

$ dd if=/dev/sdd of=card.img

จากนั้น โหลด PhotoRec มา PhotoRec เป็นโปรแกรมที่มาคู่กับ Test Disk ที่ใช้วิเคราะห์ดิสก์ที่โครงสร้างเจ๊ง โปรแกรมนี้สัญญาอนุญาตเป็น GNU GPL ใช้งานได้ทั้งหลายแพลตฟอร์มทั้งลินุกซ์ วินโดวส์ แม็ค บีเอสดี ยูนิกซ์ ฯลฯ และใช้กับระบบไฟล์ได้ทั้ง FAT (พวกเม็มโมรีการ์ดส่วนใหญ่เป็น FAT นะ), NTFS, Ext 2/3. HFS+ และอื่นๆ อีกเพียบ และไม่ใช่แค่ไฟล์ภาพพวก JPEG หรือ RAW เท่านั้น PhotoRec รู้จักฟอร์แมตของไฟล์กว่า 100 แบบ!

สำหรับ Ubuntu ก็ aptitude ได้เลย

$ sudo aptitude install testdisk

แล้วก็เรียก

$ photorec card.img

ทีนี้ก็ไปตามเมนู เลือกๆๆ เคาะ enter ไป ก็ได้ภาพกลับมา .. กรณีของแก๊งค์แมวๆ ได้ภาพและวิดีโอกลับมา 100% เลยนะ (เท่าที่จำได้) .. ดีใจๆ :D

P.S. ภาพจากทริป กำลังนั่งปั่นอยู่ .. รอหน่อยละกัน :P

Bluetooth Headset on Linux

เปิดหูฟังบลูทูธก่อน จากนั้นก็

$ hcitool scanning

ควรจะเจอหูฟังบลูทูธ ทีนี้แก้ไฟล์ ~/.asoundrc

pcm.bluetooth {
        type bluetooth
        device xx:xx:xx:xx:xx:xx
}

ใส่ address ลงไปตรง xx:xx:xx:xx:xx:xx จากนั้นลอง

$ mplayer -ao alsa:device=bluetooth file.ogg

ควรจะมี balloon ขึ้นมาตรง bluetooth manager ให้ pair device กดที่ balloon แล้วก็ใส่ PIN ให้ถูก ทีนี้มันก็จะเล่นเพลงได้ละ :D

โปรแกรมอื่นๆ ถ้า config device ของ ALSA เป็น bluetooth ก็ควรจะเล่นได้เหมือนกัน .. :)

ลองไปอย่างนั้นแหละ สุดท้ายก็ใช้ลำโพง/หูฟังเหมือนเดิม :P

WMA to WAV

มีโอกาสเปลี่ยนมือถือ + palm เป็น HTC Touch เมื่อประมาณ 2-3 สัปดาห์ก่อน .. พยายามหาโปรแกรมนาฬิกาปลุกมาใช้เพราะที่มากับเครื่องมันเสียงเป็นแมลงหวี่ คงไม่ตื่นโดยง่าย แถมใช้ได้เฉพาะ WAV อีกต่ะหาก .. แต่ก็ไม่เจอโปรแกรมฟรีตัวไหนที่มันโดนๆ .. สุดท้ายใช้นาฬิกาปลุกที่มากะเครื่องแต่แปลง ringtone ชื่อ old phone เสียงกรี๊งงงง โคตรดัง จาก WMA เป็น WAV เอาไว้ปลุก

วิธีแปลงอย่างง่ายโดยใช้ mplayer ก็

$ mplayer Ring-OldPhone.wma -ao pcm:file=output.wav

ringtone ที่เอามาแปลงนี้ คุณภาพระดับ 44.1 kHz 16 bit mono ขนาดไฟล์ประมาณ 22 kB .. แปลงเป็นไฟล์ WAV ได้คุณภาพเท่าๆ ต้นฉบับ แต่ไฟล์มันก็จะขนาดบ่ะละเฮิ่มตั้ง 229 kB … เปลืองเด้ .. ลดคุณภาพสักหน่อยละกัน

$ mplayer Ring-OldPhone.wma -af volume=0,resample=22050:0:2 -format u8 -ao pcm:file=output.wav

re-sample ลงเป็น 22.05 kHz 8-bit mono เหลือ 57 kB .. ฟังดูไม่ต่างกันมาก ขนาดไฟล์ก็พอรับได้ .. ตอนนี้เลยได้เสียงปลุกโคตรดังสมใจ แต่จะตื่นหรือไม่นั่นเป็นอีกเรื่องนึง :P

Linux on Apple MacBook

Yep, I now own a MacBook .. Core 2 Duo one, and the primary reason I choose is that it’s a great hardware to run Linux (and it’s relatively cheaper). I did some research to convince myself that Linux run well on this notebook. I could tell you that ‘now’ is the right time to have Linux running on MacBook since all hardware components are now well supported. Even better, newer distribution such as Ubuntu 7.04, which officially use 2.6.20, supports most parts of MacBook out-of-the-box. :)

Installation

You may completely overwrite OSX by Linux, but I think it is still a good idea to leave OSX on MacBook at least to upgrade firmware. So, the set up will be dual boot (or even triple boot with .. err .. MS Windows XP/Vista). Next, installation steps.

In Mac OS X, make sure you update all firmware available. Upgrading software is also preferred.

Download the latest version of rEFIt and follow its instruction to install rEFIt in your OSX volume. rEFIt is an EFI boot menu and EFI GPT utilities.

Download Boot Camp from Apple’s web site, run and follow its instruction, burn a Windows Driver CD (you will need it), and make sure you partition the disk so that available space is large enough for Linux. My choice would be that largest possible for Linux, smallest possible for OSX. After partitioning the disk, reboot.

Alternatively to Boot Camp, you may use ‘diskutil’, a command line to partition your disk. Just make sure that you know exactly what you are doing.

Install Linux. I’d recommend Ubuntu 7.04 Feisty Fawn. Good news is that Feisty uses the Linux kernel version 2.6.20, which includes several supports for MacBook (and other Apple machines). So, just boot up the live CD. If it produces a kernel panic, try boot option of

lpj=8000000

for MacBook 2.0 GHz, or

lpj=7330000

for MacBook 1.8 GHz.

Double click “Install”, at disk partition step, choose “Manually edit partition”. Do NOT touch sda1 and sda2, they are EFI GPT and Mac OS X, respectively. Make sure your root partition is sda3 or sda4. The others can be sda5 and beyond.

Okay, a lecture, MacBook uses Extensible Firmware Interface (EFI) instead of BIOS, and EFI uses GUID Partition Table (GPT) to describe partitions. There is no notion of ‘extended’ or ‘logical’ partition in GPT, and you are no longer limit to 4 (primary+extended) partitions. GPT allows up to 128 partitions, but for backward compatible with legacy BIOS mode, bootable partition(s) should be one of the first 4 partitions. Don’t worry, Linux knows EFI for quite some time and GNU Parted is capable to handle GPT quite well.

After reboot, you should see Tux sitting in the beautiful menu of rEFIt. Choosing Tux will bring you to GRUB boot loader. If not, reboot to rEFIt menu and choose ‘Partition Tool’ to sync GPT and MBR. GRUB should work after sync.

Things that work out-of-the-box and without additional configurations are

  • Intel HD Audio (snd_intel_hda)
  • Marvell 88E8053 10/100/1000BASE-T Gigabit Ethernet (sky2)
  • USB Controller (uhci_hcd, ehci_hcd) .. noted that build-in keyboard, AppleTouch, Infrared, and iSight are hardwired to USB.
  • Bluetooth
  • Agere FireWire (ohci_1394)
  • Suspend-to-Disk (hibernate) and Suspend-to-RAM (suspend)
  • Special keys (brightness, volume, eject)

Display

MacBook is equipped with Intel GMA 950 Integrated Graphics processor and 1280×800 13.3-inch glossy TFT display. X.org’s i810 driver + i915 DRM work well for this. However, it is 1024×768. To get native resolution of 1280×800, ‘915resolution’ helps.

# aptitude install 915resolution

Restart X .. done.

Apple PowerBook Keyboard

Okay, keyboard works, but I don’t like default mode, i.e, Fn + F1 = F1. I just want F1 to be F1 and use Fn to get special keys (backlight, volume, etc.) To do so, append the following to /etc/modprobe.d/options

options hid pb_fnmode=2

PowerBook Keyboard mode can be controlled via /sys/module/hid/parameters/pb_fnmode. 1 = OS X-ish, 2 = PC-ish

AppleTouch

Again, it works via X.org’s synaptics touchpad driver, but the default config sucks (sorry ..). Additionally, only one button may not be enough. Synaptics driver is very powerful and flexible if you know how to deal with. Try

$ man synaptics

You’ll see all available options. My config for synaptics is the following:

Section "InputDevice"
        Identifier      "Synaptics Touchpad"
        Driver          "synaptics"
        Option          "SendCoreEvents"        "true"
        Option          "Device"                "/dev/psaux"
        Option          "Protocol"              "auto-dev"
        Option          "LeftEdge"              "20"
        Option          "RightEdge"             "1200"
        Option          "TopEdge"               "20"
        Option          "BottomEdge"            "370"
        Option          "FingerLow"             "15"
        Option          "FingerHigh"            "30"
        Option          "MinSpeed"              "0.79"
        Option          "MaxSpeed"              "0.88"
        Option          "AccelFactor"           "0.015"
        Option          "MaxTapTime"            "100"
        Option          "MaxTapMove"            "80"
        Option          "MaxDoubleTapTime"      "95"
        Option          "TapButton1"            "1"
        Option          "TapButton2"            "3"
        Option          "TapButton3"            "2"
        Option          "VertTwoFingerScroll"   "true"
        Option          "VertScrollDelta"       "10"
        Option          "HorizScrollDelta"      "10"
        Option          "ClickTime"             "100"
        Option          "SHMConfig"             "on"
EndSection

You may use ‘synclient‘ to fine tune edges, pressure, timing, etc.

AirPort Extreme

MacBook C2D uses relatively new WiFi chip from Atheros that supports up to 802.11n. You have two options here: ndiswrapper or madwifi. Ubuntu provides ndiswrapper and should works out-of-the-sbox. Anyway, newer versions of ndiswrapper fixed many issues occurred in MacBook. First, install additional packages

# aptitude install linux-headers-generic
# aptitude install build-essential

Then, download ndiswrapper, unpack, build, and install

$ tar xzf ndiswrapper-1.44.tar.gz
$ cd ndiswrapper-1.44
$ make
$ sudo make install

Next, you’ll need the proprietary driver written for MS Windows. It is in the disk burned during Boot Camp.

$ mkdir atheros-driver
$ cd atheros-driver
$ unrar x atherosxpinstaller.exe

Install the driver, and insert ndiswrapper module. The wlan0 interface will be up.

# ndiswrapper -i /path/to/atheros-driver/net5416.inf
# modprobe ndiswrapper

If things go well, you may want to append the following in /etc/modules

ndiswrapper

Now, ndiswrapper will be inserted automatically during boot up your system.

For madwifi, you need snapshot version of 0.9.30.13 or newer. Download, unpack, build, and install.

$ tar xzf madwifi-hal-0.9.30.13-current.tar.gz
$ cd madwifi-hal-0.9.30.13-r2351-20070519
$ make
$ sudo make install

Just replace existing files if there exist. Now, it’s ready to use

# modprobe ath_pci

The wireless LAN device wifi0 should be ready, and the ath0 interface should also be created automatically. Since madwifi is multiband driver, it can create multiple network interfaces, running different mode, from a single wireless device. Although ndiswrapper 1.44 is more stable, I’d prefer madwifi mainly because it is open source, and it supports monitor mode.

iSight

This does not work out-of-the-box. You’ll need a patched version of uvcvideo 0.1.0-e. Download, unpack, make, and install

$ tar xzf linux-uvc-0.1.0-e.tar.gz
$ cd linux-uvc-0.1.0-e
$ make
$ sudo make install

The module will be installed in /lib/modules/<kernel-version>/usb/media, and should be moved to /lib/modules/<kernel-version>/misc/. A utility named ‘extract’, provided with uvcvideo, to load Mac OS X firmware of iSight.

# mount /dev/sda2 /mnt
# extract /mnt/System/Library/Extensions/IOUSBFamily.kext/Contents/PlugIns/AppleUSBVideoSupport.kext/Contents/MacOS/AppleUSBVideoSupport
# modprobe uvcvideo

Alternatively, download isight-extract utility. This utility will extract iSight firmware from AppleUSBVideoSupport.

$ cd isight_extract
$ make
$ extract /mnt/System/Library/Extensions/IOUSBFamily.kext/Contents/PlugIns/AppleUSBVideoSupport.kext/Contents/MacOS/AppleUSBVideoSupport

The file named ‘isight.fw’ will be created in the current directory. Put this file to /lib/firmware/<kernel-version> iSight firmware should be loaded automatically when uvcvideo is inserted. Try ekiga with V4L2 driver to test iSight camera.

iRemote

To use iRemote, install inputlirc

# aptitude install inputlirc

Now, iRemote will be able to control volume :D .. Additionally, install lirc and lirc-x and get more fun

# aptitude install lirc lirc-x

The two packages provides many utilities, including ircat, irexec, irxevent. Consult manpages for more information. Also, this is <a href=files/lircrc>my ~/.lircrc</a> to control a number of applications via iRemote.

Not test yet

  • FireWire

Seem to work though.

Zenoss 1.1 on Debian

ขั้นตอนอย่างง่ายๆ

สร้าง user สำหรับ zenoss

# adduser --system --shell /bin/bash --home /opt/zenoss --ingroup src --disabled-password zenoss

ถ้า adduser ไม่สร้าง directory และตั้ง permission ให้ก็ดำเนินการตามนี้

# mkdir /opt/zenoss
# chown zenoss /opt/zenoss

su เป็น zenoss แล้วก็สร้างไฟล์ ~/.bashrc ตามนี้

export ZENHOME=/opt/zenoss
export PYTHONPATH=$ZENHOME/lib/python
export PATH=$ZENHOME/bin:$PATH

เพิ่ม user zenoss ใน /etc/sudoers ตามนี้

Defaults    env_reset
Defaults    env_keep = "PYTHONPATH ZENHOME"
zenoss ALL=(ALL) NOPASSWD: /opt/zenoss/bin/python,/usr/bin/kill

ลงแพ็คเกจที่จำเป็นอื่นๆ

# aptitude install mysql-server-5.0 python-dev libmysqlclient-dev g++ make patch bzip2 autoconf swig

โหลด & untar & ติดตั้ง zenoss

$ tar xzf zenoss-1.1.2.tar.gz
$ cd zenoss-1.1.2
$./install.sh

รอ รอ ….

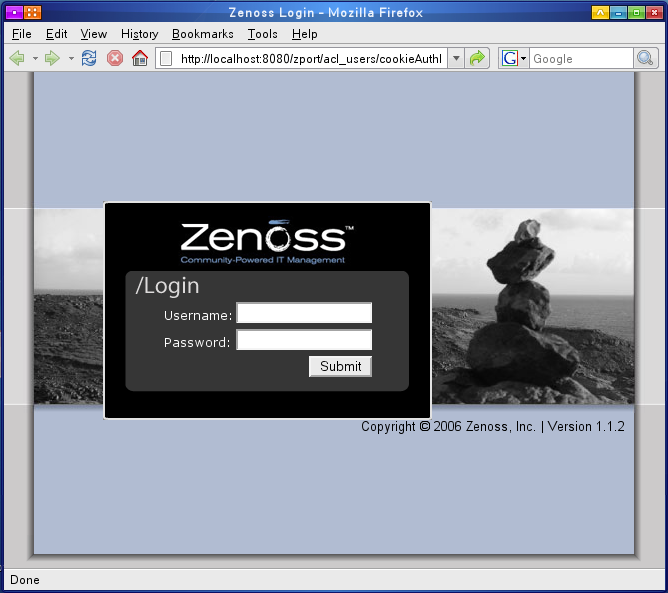
และแล้ว

เย้ .. จริงๆ แล้วจะติดตั้ง zenoss โดยใช้ไลบรารีต่างๆ ที่มีอยู่แล้วในเดเบียนก็ได้ แต่ขั้นตอนจะยุ่งยากกว่านี้โข .. อีกหน่อย zenoss คงจะออก .deb ให้ติดตั้งง่ายๆ ล่ะน่า